In this article we will learn how to move your new or existing WordPress website from HTTP to HTTPS by changing some WordPress settings.
In case you have already moved WordPress from HTTP to HTTPS but you are still getting a “Not Secure” warning in Chrome, please refer to our Mixed Content article.
HTTPS stands for Hyper-Transfer-Protocol-Secure and is an encryption method that secures the connection between the browser of your visitors and your server. This makes it almost impossible for attackers to eavesdrop on the connection.
Having HTTPS enabled does not only increases the security of the site, it also brings other advantages (SEO, Ranking, Trust and many more).
Enable a SSL certificate
In order to enable HTTPS, every website needs a so-called SSL certificate. Depending on your web hosting provider, you might have to purchase a SSL certificate or you will be able to enable a free one like Let’s Encrypt inside of the control panel.
If you need to purchase a certificate, please ask your web hosting provider to install it for you.
DIHOST provides free and premium certificates to all customers.
If you have a shared hosting package (with cPanel), a certificate will be issued automatically for all your websites within a few hours after adding the domain to the cPanel account.
For cloud hosting packages, a free Let’s Encrypt certificate can be enabled in the cloud panel (see this article).
To check if the SSL certificate is active, try to access your website over HTTPS. Simply type https:// following your domain name – as an example: https://dihost.net.
If you can see your website without getting an error message or warning, your website has a SSL certificate enabled and we can continue with our settings.
Update SSL/HTTPS in WordPress
If you have installed WordPress before having a SSL certificate enabled, WordPress might be configured to use HTTP instead of HTTPS. This information can be easily changed on the WordPress General Settings page.
First login to your WordPress administration and navigate to General » Settings.
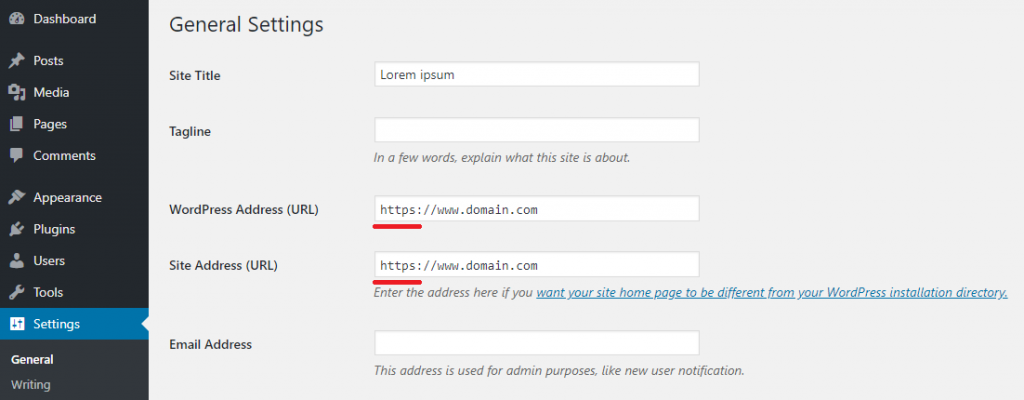
Simply replace http with https for both the WordPress Address (URL) and Site Address (URL) fields. Do not forget to save the changes.
You will now be logged out, but you can simply login again.
And voilà – your WordPress website is now fully accessible over HTTPS.
Last but not least enable the automatic HTTPS redirection to redirect all visitors from HTTP to HTTPS. This needs to be done at the web hosting control panel or inside the .htaccess file. This topic will be covered in another article soon.